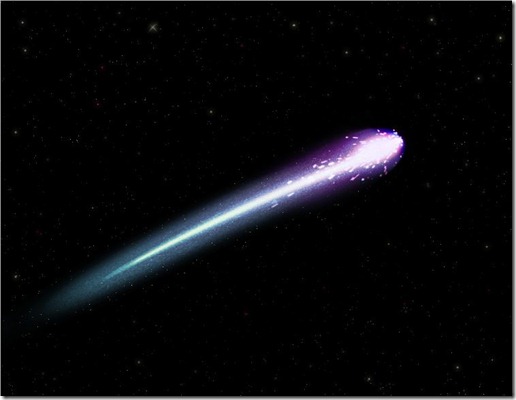
 In this tutorial you will hopefully be able to make a shooting star without using the default resources present in Photoshop CS 2-4. The tutorial requires basic to intermediate level of Photoshop skill and you should know how to get around the software and use its tools.
Step 1: Preparation
Open a new file in Photoshop, keep the resolution to 300 dots per inch and size of around [10,6] = [x,y] inches.
Kill the background layer and add a new layer so that now we have a transparent layer to play with.
Rename your Layer to SStar
Step 2: Basic Shapes
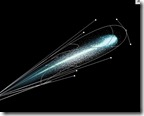
Pick up the pen tool and draw a path with a very slight curve. You can do this by just using two anchor points.
Select a soft brush from the brush tool and resize it to 250 pixels.
Now go to the brush settings you can find them on the top right corner on Photoshop CS-4, and turn on the shape dynamics. 
Set the minimum diameter to 24 percent .
Using the path selection tool [pointer] right click on your path and select the option stroke path. You will get a dialogue box with a list and a check box. Check the simulate pressure checkbox and select brush from the list. This should result in a fading line as in fi gure.
gure.
Make a new layer. Increase the Brush diameter to 300 pixels and make a spot on top of your previous path therefore making the head of our shooting star.
Scale and rotate it to make it look like a sphere. There are more cool ways to do it but lets just settle with that.
Merge the two layers of your drawing and we are almost done with the basics.
Create a new layer and name it background, use the color bucket to color it black. Send this layer behind your SStar layer.
Step 3: Effects
Select the SStar layer and go into blending options. You have to apply the following:
-
Outer Glow; Opacity 40 percent , Spread 88 percent, Size 0px, Color Light Blue
-
Inner Glow; Opacity 75 percent, Choke 7 percent, Size 5px, Color Grass green
-
Color Overlay ; Color Sky blue ; Opacity 10 percent
-
Gradient Overlay : Opacity 41 percent; Color Yellow to White
Tip: You can have any color combination in the inner and outer glow, some examples are: Blue and violet, yellow and light red etc..
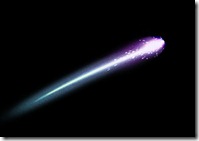
After applying all these effects your shooting star should look like a sperm- figure: 
Now we have to add some little sparks on its head. So create a new layer, name it sparks use your brush to create sparks on top of the shooting star. Duplicate this layer and from the layer properties select overlay. so that we have a nice non uniform set off sparks on our star.
Duplicate the SStar layer and rename it to glow. apply Gaussian blur to it. You can find it in filters->Blur->Gaussian Blur. Set it to 55 percent and press ok. You should get a very mild smoke around your shooting star. That’s not it, now go to the Blending Options of the layer glow, and check outer glow. Settings: Spread 3% and size 16px color light blue.
To make it more realistic, add anew layer on top of everything and name it Dust. Select a soft brush and from the brush settings toolbar [on top] select the option dissolve. By default this should be Normal. Select a brush size of 500px and apply one spot on the head of the star.
Select warp from edit->transform->Warp, and extend the left corners to the bottom left corner. There is no hard and fast rule for this but you have to extend the grains to the tail of the star.
From the layer blending options select overlay for the layer Dust. Move the layer on top of SStar so that we now have a layer configuration like: Background, SStar, Dust,Glow, Sparks
Step 4: Finishing
Create a new layer and name it heat. Place it on top of all the layers and put a gradient on it. the direction should be diagonal so that your gradient is parallel to your star. The color should be Mauve to transparent. The Mauve side on the head of the star.
From the Layer Blending options menu select the ![]() option Vivid light. Erase the portion of this layer which are outside the star’s region.
option Vivid light. Erase the portion of this layer which are outside the star’s region.
Create a new layer, name it stars. using color bucket fill it with white. From the layer panel select the option dissolve and reduce the opacity to 11 percent and fill to 9 percent.
Place this layer on top of background layer, you will get tiny stars in the background.
Create on final layer name it BStars, place it on top of layer stars. using soft brush make tiny spots at random places. It is advisable that you make these spots of different sizes. Put a glow to this layer to make it more realistic.
Final layer configuration, yours should be like this:
-
Heat
-
Sparks
-
Glow
-
Dust
-
SStar
-
BStars
-
Stars
-
Background
And voila we are done.!


how to make the sparks?
To make the sparks use lens flare effect from the filters menu.
Very useful, thanks!
hi I just have 1 question, when I do the the stroke path, it doesn’t appear to be a fading line but just look like a normal brush stroke even though I change the minimum diameter for 24%. I did check the stimulate pressure too but I really don;t know what did I do wrong. could you tell me every setting in the shape dynamics that you did please, thank you so much
Here is a screen shot of the settings: https://whizzyifti.files.wordpress.com/2010/10/2.jpg
what you mean by grains in warp transform. also you said left cornersss unless you meant all corners?